How to Use a Nail Drill on Yourself?
Introduction:
A nail drill is a versatile tool that can help you achieve professional-looking manicures and pedicures at home. However, it's essential to use it correctly to ensure safety and achieve the desired results. In this guide, we will provide step-by-step instructions on how to use a nail drill on yourself. Please note that safety should always be a priority, and if you're unsure or uncomfortable, it's best to consult a professional nail technician.
I. Preparing for the Nail Drill Session
Before using a nail drill, it's crucial to gather all the necessary tools and ensure your workspace is clean and well-lit.
Gather the Required Tools:
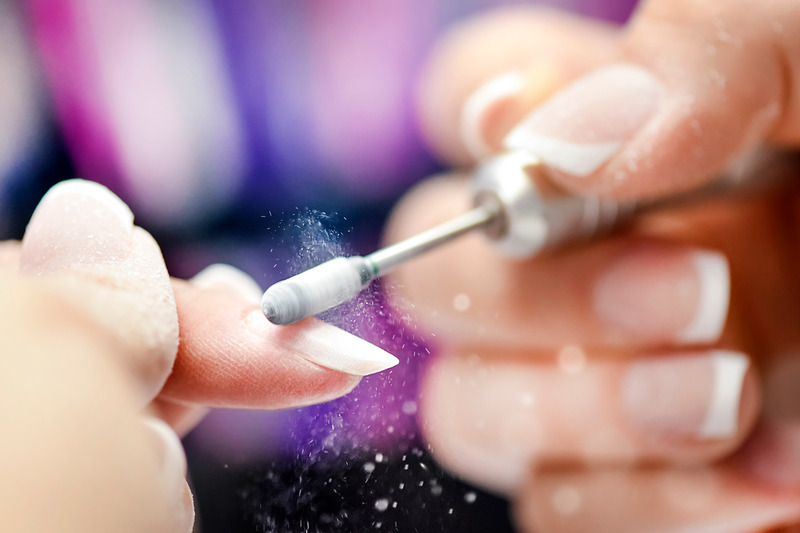
a. Nail drill: Choose a high-quality nail drill with adjustable speed settings.
b. Drill bits: Select appropriate drill bits based on the task you want to perform (e.g., filing, shaping, or removing gel polish).
c. Safety glasses: Protect your eyes from any debris or dust.
d. Nail brush: Use a brush to remove any dust or debris from your nails and the drill bits.
e. Cuticle oil: Apply cuticle oil to moisturize and protect your cuticles.
f. Towels or paper towels: Keep these nearby for easy cleanup.
Prepare Your Workspace:
a. Clean your work area: Ensure that your work surface is clean and free of any clutter.
b. Set up a comfortable station: Position your hand or foot comfortably to have easy access to your nails.
c. Good lighting: Use a well-lit area or a lamp to ensure proper visibility.
II. Familiarizing Yourself with the Nail Drill
Before using a nail drill, it's important to become familiar with its different parts and functionalities.
Understand the Drill's Components:
a. Handpiece: This is the part you hold and control. It contains the motor and attaches to the drill bits.
b. Speed control: Most nail drills have adjustable speed settings. Start at a low speed and gradually increase as needed.
c. Chuck: The chuck is where the drill bits are inserted and secured.
Get Comfortable with the Drill Bits:
a. Different types of drill bits serve various purposes. Common types include filing, shaping, buffing, and removing gel polish.
b. Ensure the drill bits are properly inserted and securely fastened in the chuck.
III. Using the Nail Drill Safely
Safety is paramount when using a nail drill. Follow these guidelines to protect yourself and avoid any accidents.
Protect Your Eyes:
a. Wear safety glasses or goggles to shield your eyes from any debris or dust created during the drilling process.
Start with Low Speed:
a. Begin at the lowest speed setting to get accustomed to the drill's vibrations and power.
b. Increase the speed gradually as you gain confidence and control.
Maintain Gentle Pressure:
a. Apply gentle pressure while using the nail drill. Excessive pressure can cause discomfort or damage to your nails.
Avoid Drilling the Skin:
a. Be cautious and avoid the skin around your nails. The drill bit should only come into contact with your nails.
IV. Using the Nail Drill for Different Purposes
Now that you are familiar with the nail drill and the safety measures, let's explore how to use it for specific tasks.
Filing and Shaping Nails:
a. Start with a fine-grit drill bit for shaping and a coarser one for filing down length.
b. Use the drill in a back-and-forth motion, following the natural shape of your nails.
c. Be mindful of the length and shape you desire, and avoid over-filing.
Buffing Nails:
a. Choose a buffing drill bit or attachment.
b. Gently glide the buffing bit over the nail surface to smooth out any ridges or imperfections.
Removing Gel Polish:
a. Use a specialized drill bit for gel polish removal.
b. Start at a low speed and carefully file away the gel polish layer by layer, taking breaks if necessary.
c. Be cautious not to over-file or damage the natural nail underneath.
V. Aftercare and Maintenance
Proper aftercare and maintenance will help keep your nails healthy and the nail drill in good condition.
Clean the Drill Bits:
a. Remove the drill bits from the chuck and clean them using a nail brush to remove any debris.
b. Sanitize the drill bits with an appropriate disinfectant.
Moisturize and Protect:
a. Apply cuticle oil to your nails and cuticles after using the nail drill to keep them moisturized.
b. Use a hand or cuticle cream regularly to maintain healthy nails and skin.
Conclusion:
Using a nail drill on yourself can be a convenient way to achieve beautiful nails at home. By following the step-by-step instructions outlined in this guide and prioritizing safety, you can effectively use a nail drill for filing, shaping, buffing, and gel polish removal. Remember to start with low speed, maintain gentle pressure, and avoid drilling the skin. With practice and care, you'll become proficient in using a nail drill to achieve salon-worthy results.